Any changes that are made in this area of the program will require the Handheld to exit and restart the Ideal Handheld software before the changes made will be visible.
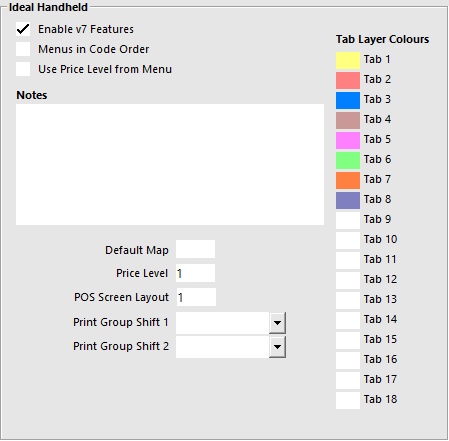
Go to Setup > Global Options > Miscellaneous > Ideal Handheld.
Enable v7 Features - This allows you to connect to the database and use the POS Screen Tabs to create the items on the Handheld rather than menus. This option must be enabled when using Handheld version 3 or higher.
Menus in Code Order – Menus are sorted by default in Alphabetical Order, you can change this setting by checking this box.
Use Price Level from Menu – The price level will be selected from the menu that is being used at the current time.
Notes – This function is used to display the “Specials of the Day” etc. Use the tilde ~ special character to force the items onto a new line on the Handheld.
Default Map – This allows you to set which Table Map will be used on the device by default. You cannot have the same table number on different maps (usually made when copying maps). Note that when a Default Map has been set via this setting, only that Table Map will be sent to all devices running the app; other Table Maps will not be available from the app. If all Table Maps are required but only specific devices need to be restricted to a Default Table Map, leave this setting as blank and instead, configure the setting within the app. In the app on each device, go to Settings > Enter Password > Default Table Map > Enter the code for the Table Map > Save.
Price Level – You can set the default price level to be used by the Handheld. If no price level is selected, Price Level 1 will be used.
POS Screen Layout – This function allows you to choose which POS Screen layout is sent to the Handheld. You may have a specific menu/layout that is not used on POS terminals and is setup on a handheld to be easier.
Print Group Shift 1/2 – Once setup, swipe the item onscreen to the right & it will display the print group shifts.
Tab Layer Colours – These colours represent the 18 different tabs you use at the bottom of the POS Screen layout. Tab Layer Colours are not displayed on an iPad; they are only displayed on an iPod or iPhone.
Other options are available for the Handheld to use are direct from the terminal the Handheld is licensed.
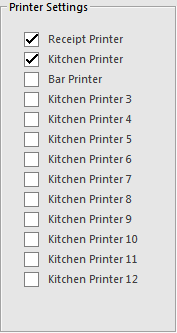
The Handheld will by default, use the printing options of the host PC.
Under some circumstances, the Handheld can print to the kitchen and the terminal will not.
This is setup per POS Terminal and uses Sales Categories linked to Sales Category Descriptors.
The Stock Item must be configured to not have an order printer selected, which disables printing from the POS Terminal.
Go to File > Stock Control > Stock Items > Modify > Printer Settings.
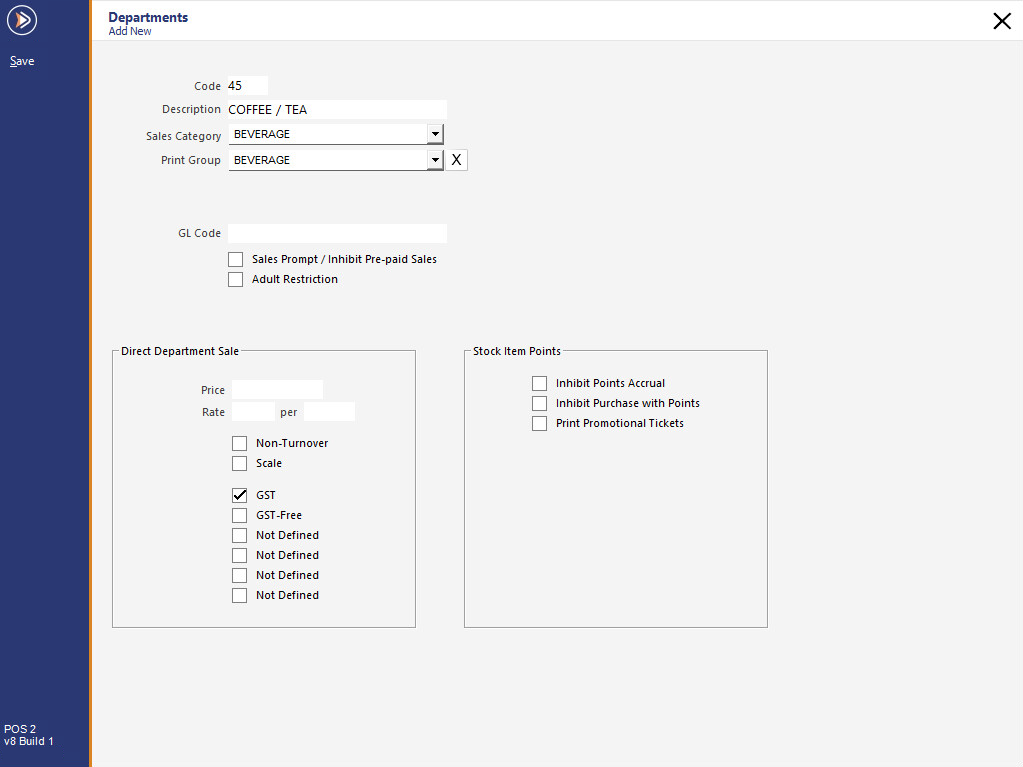
Check the Department Code the Stock Item is linked to.

Go to File > Sales > Departments > Modify the Department the Stock Item was linked to (Coffee/Tea) > Ensure the Sales Category is linked to Beverage.
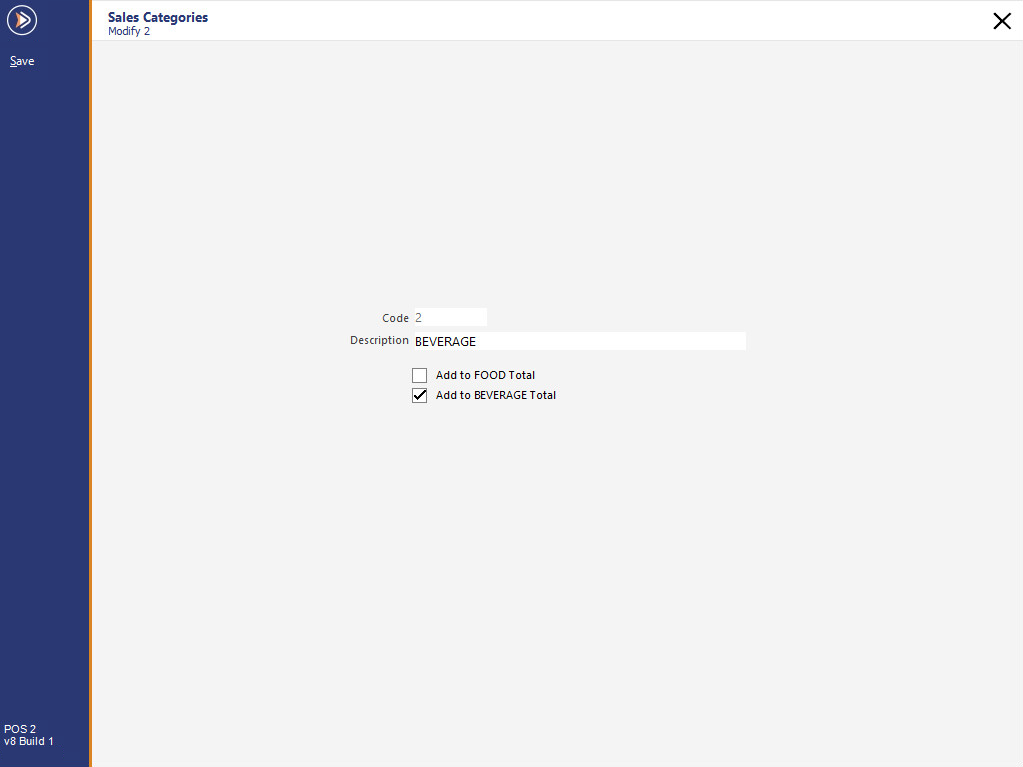
Go to File > Sales > Sales Categories > Modify the Sales Category the Department was linked to (Beverage) > Ensure it has been selected for ‘Add to BEVERAGE Total’.
Go to Setup > POS Terminals > Modify the selected terminal > Miscellaneous > Handhelds.
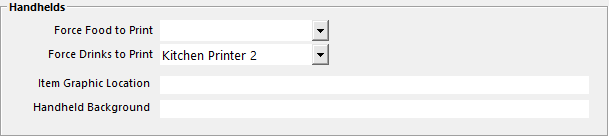
These settings allow you to force all orders to be printed from the Handhelds only to a specific printer.
Force Food to Print and Force Drinks to Print can both be forced to print their respective items to the relevant printers.
When a Flat White is ordered through the POS Terminal, no kitchen docket will print, however, when ordered through the handheld device, the docket will be printed automatically.
To use Item Graphics and Table Map (Handheld Background) images, they need to be hosted on the web.
Link to their locations so they can display on the iPad app using v7 features.
Item Graphics will only display for POS Screen Tabs and Menus when the images are the named the exact same as the Tab or Menu you want them to represent.
Beer.jpg for Beer, etc.
Images must not have a space in the file name and be the same file used on the POS Screen programming.
The Ideal Handheld Module is used to define how many Handheld devices will be connected to a terminal in the registration.
The number of devices is indicated by the number next to the IH (IH1) in the registration options.
It is a requirement of this module that Restaurant (RST) module is also installed.
You will also need to ensure there is a Table Map with programmed tables.
Ideal Handheld will not work without at least one table.
If you have a licence for 3 Handhelds (IH3) in your venue, this means you can use any 3 devices with the app installed.
If a staff member is using their own device, and leaves the venue without logging out of the app, their device will still be using one of the 3 licences available to you.
To unlock devices and allow new devices to connect, restart the POS software on that terminal.
All connections will drop and allow new devices to connect.